Welcome to the Semrush Social Toolkit.
This guide will walk you through the essential setup steps to automate your entire social media workflow and start managing your strategy with minimal effort.
In this guide, you will learn how to:
- Access all the tools in the Social Toolkit
- Set up competitor tracking
- Automate your reports
- Generate a full social media calendar
Step 1: Access Social Toolkit
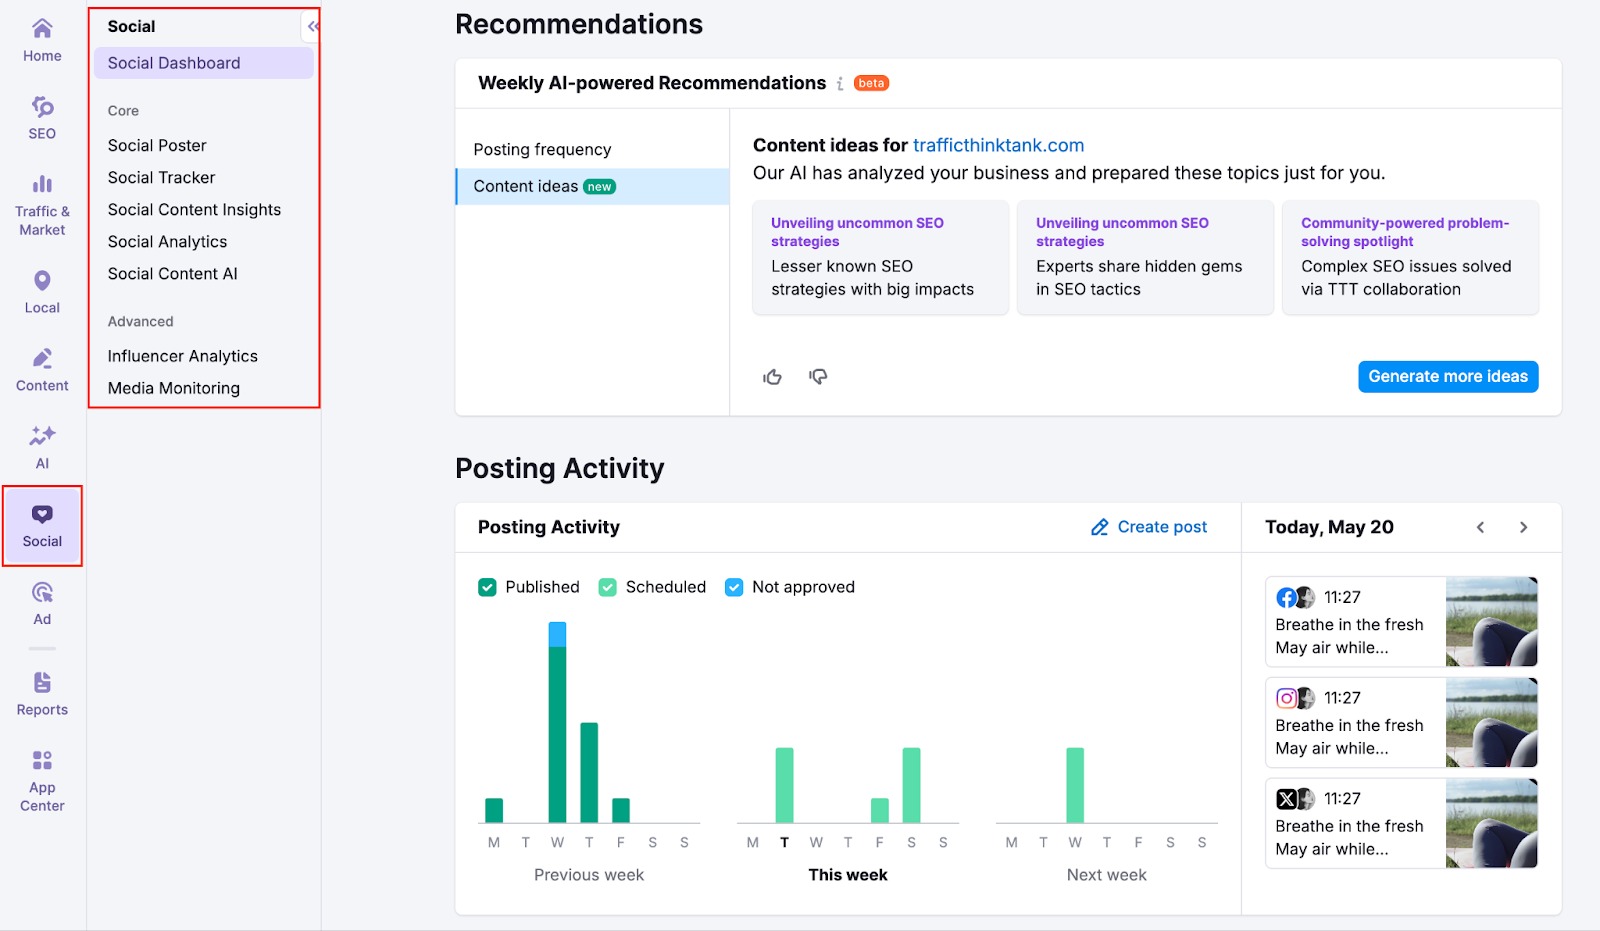
To begin, head to the Social Toolkit from your Semrush dashboard. On the main menu, navigate to Social > Social Dashboard.
You’ll now be prompted to connect your social profiles. This is a mandatory step. You must connect at least one social media profile to use any of the tools.
Choose from a range of platforms, such as Facebook, Instagram, LinkedIn, X (Twitter), Google Business Profile, Pinterest, and more.

Once your social profiles are connected, key tools within the Social Toolkit become active.
You can now access these tools, which have performance insights built in, so you won’t have to start from scratch.
Here’s how each tool fits into your workflow:
Social Dashboard: Start here to get a helicopter view of your social media performance. Examine combined and platform-specific metrics—such as audience growth, post performance, impressions, and engagement trends—all in one place. Get AI-powered recommendations on what to post and how often.

Social Content AI: Turn those insights into action. Generate ready-to-use post ideas, captions, hashtags, and visuals tailored to your brand.

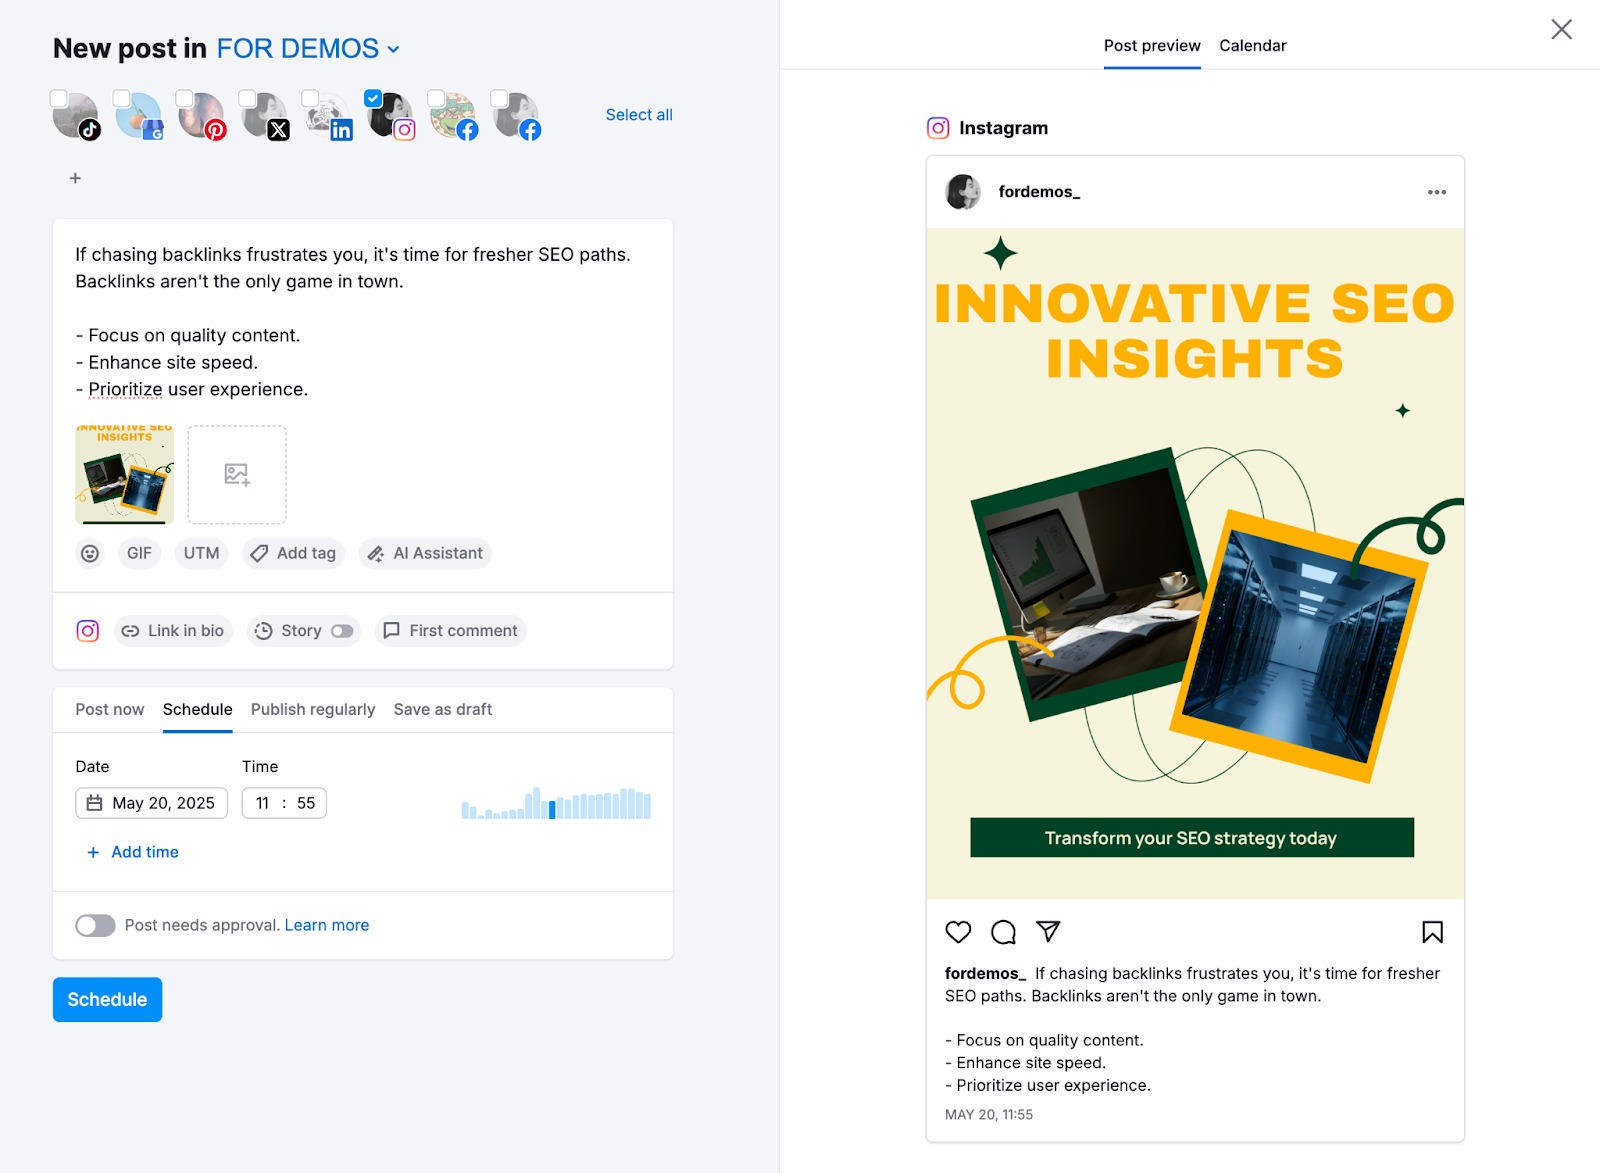
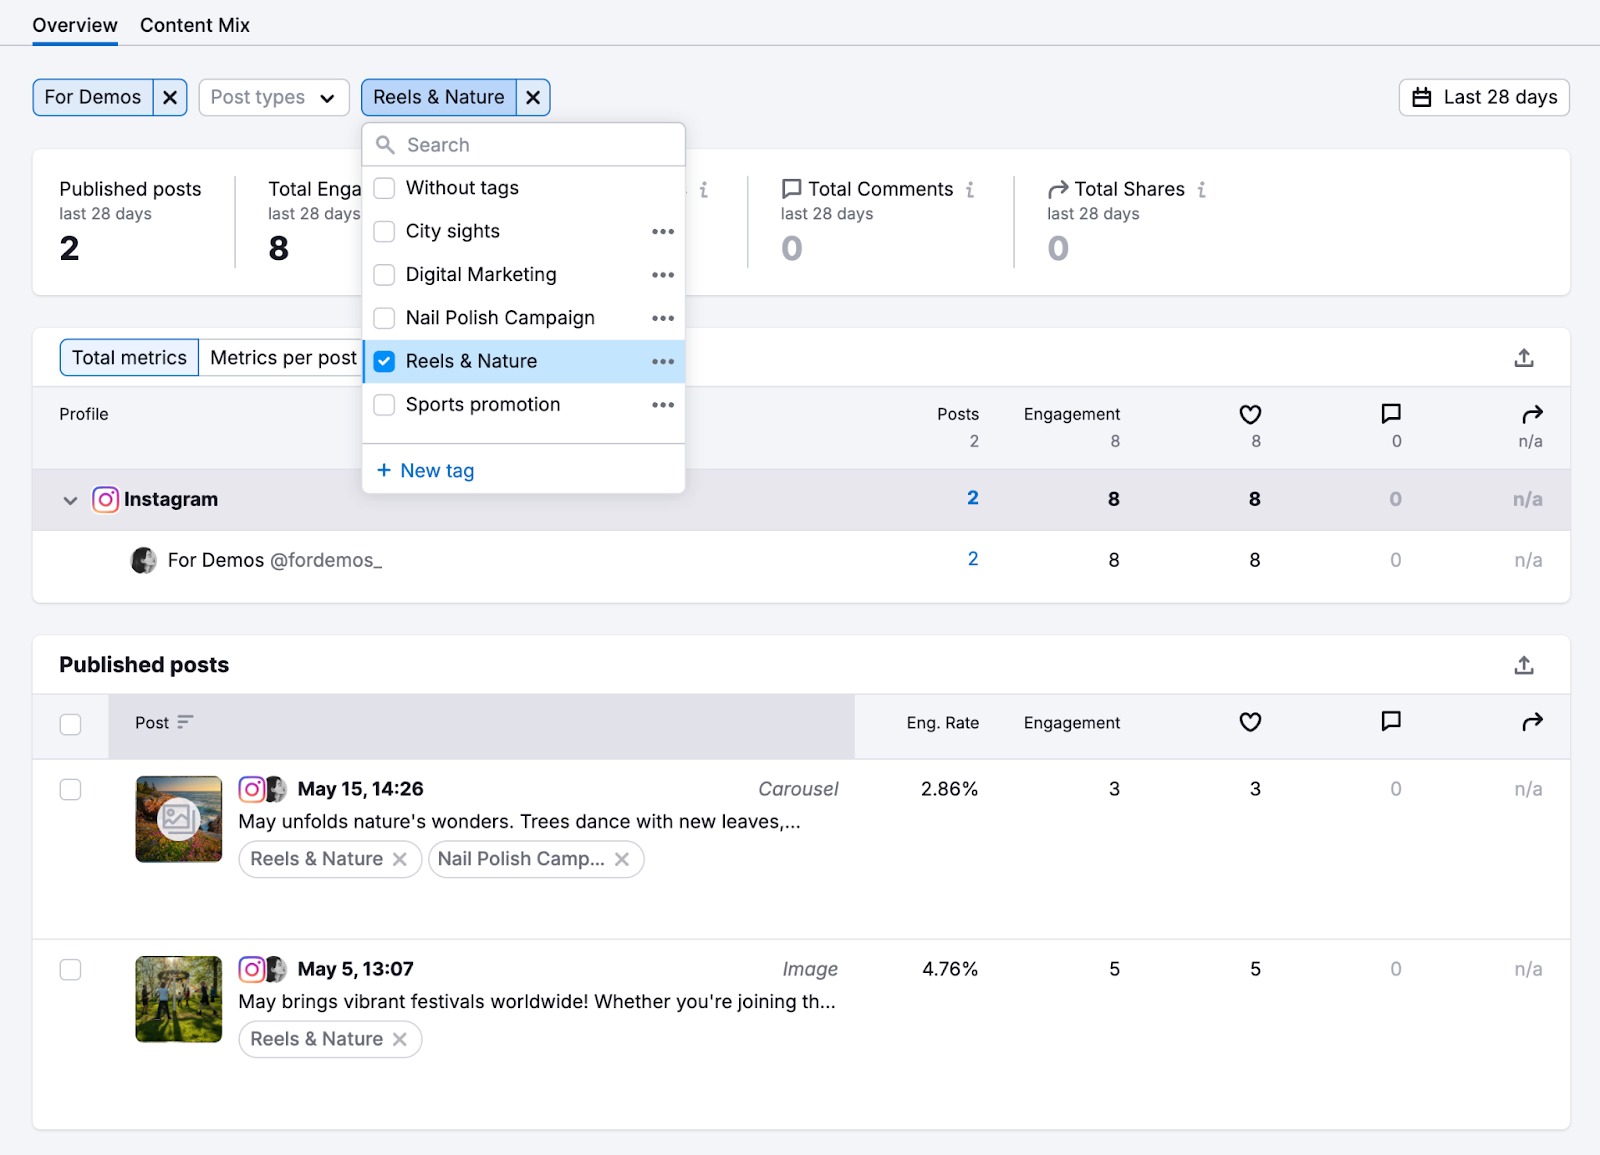
Social Poster: Send your content ideas and posts straight to Social Poster. This is where you can plan, schedule, and publish posts across multiple platforms, using the interactive drag-and-drop dashboard. Add tags for better reporting (see below).
Social Content Insights: Visualize what’s working and how well. This tool highlights your top-performing posts, tags, and campaigns, so you can double down on what drives results.
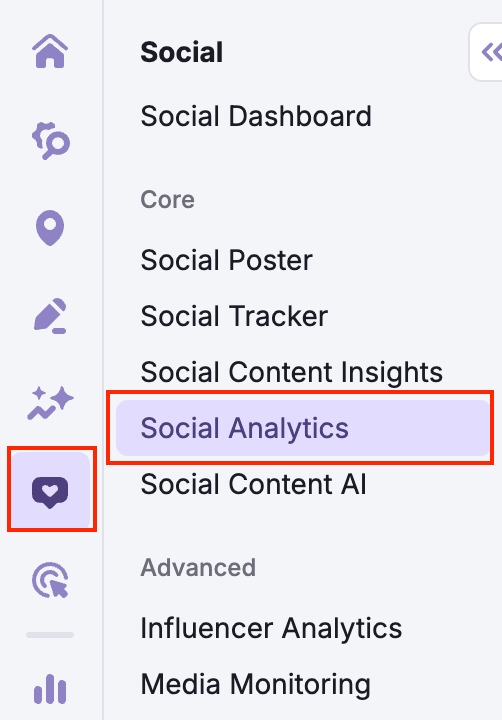
Social Analytics: Track performance metrics across all your connected accounts—including new page likes, new followers, post reach, post engagements, page views, profile interactions, and engagement rate.

Taken together, these tools form a seamless automation loop, from insights to content to reporting, to help you manage your strategy with minimal effort.
Part 2: Set Up Competitor Tracking
Next, set up competitor tracking so you can see how your brand compares without manually monitoring your competitors’ individual social media profiles.
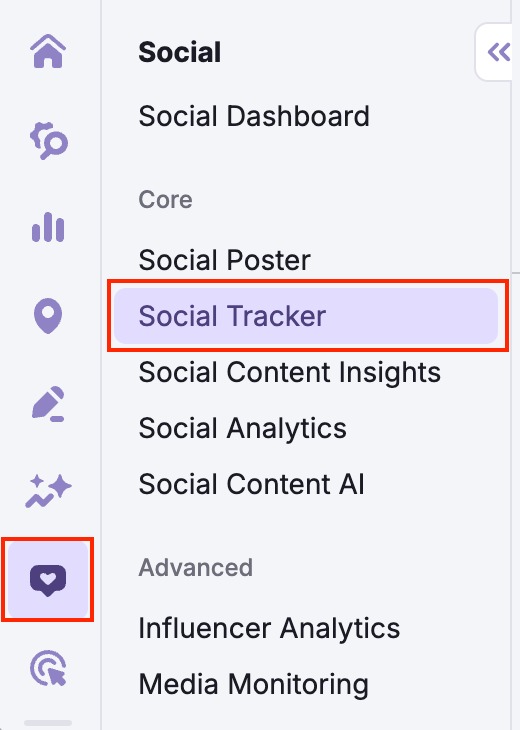
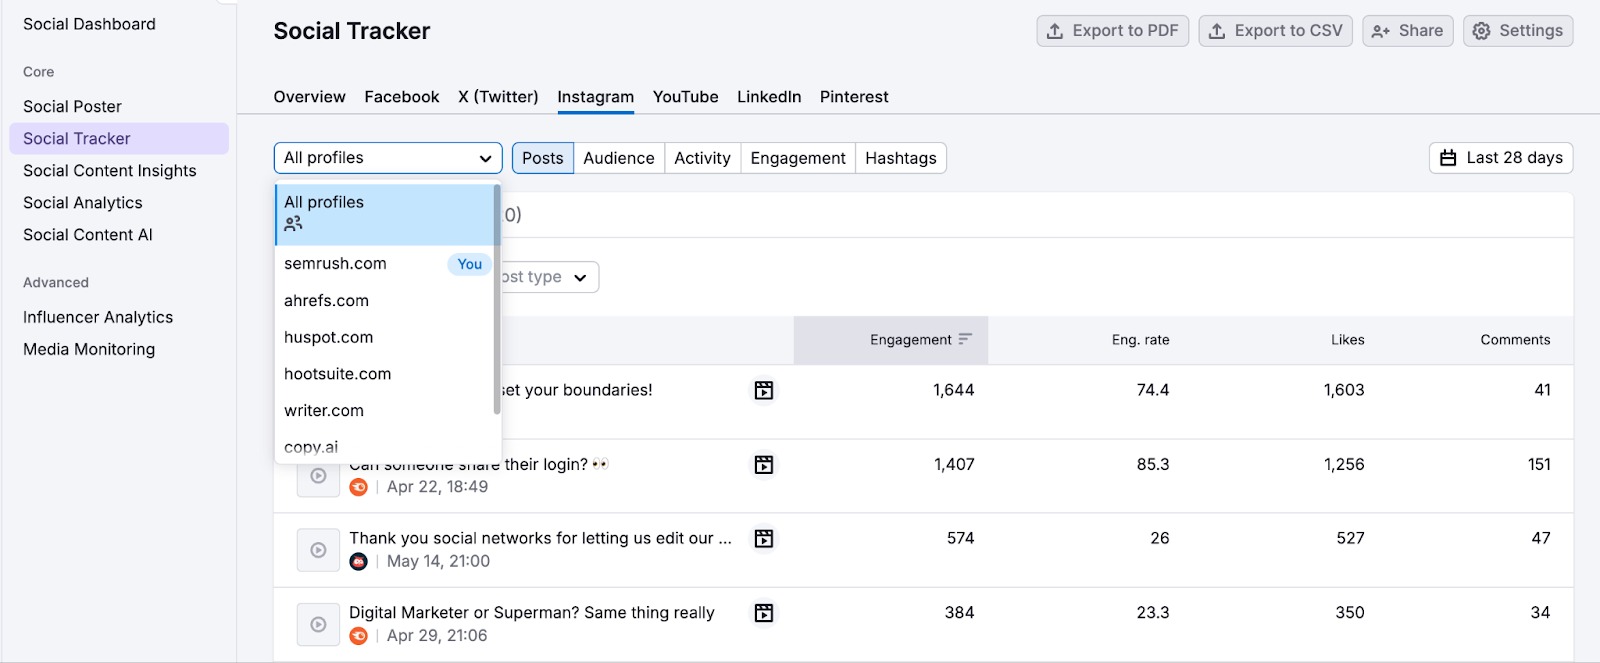
In the Social Toolkit, go to Social Tracker.
If you've already connected your social profiles, they'll show up under You.

If not, enter your brand name or website URL and click Add company.

Then, add your competitors. Depending on your plan, you can track up to 20 social media profiles across platforms such as Facebook, Instagram, X (Twitter), Pinterest, among others.
Click Start tracking companies to begin.

Once set up, you’ll be able to compare:
- Audience size, engagement trends, and posting frequency across platforms
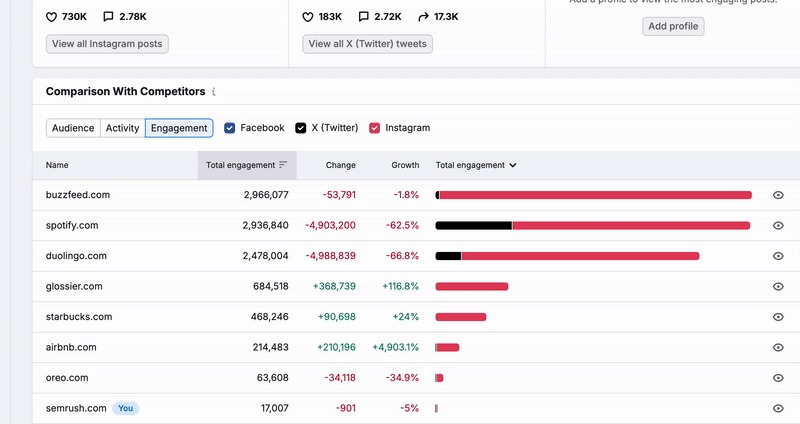
- Comparative growth metrics for audience, posting, and engagement

- Performance metrics for each social channel
All this data flows directly into your Social Dashboard and Analytics reports, so you always have a finger on the pulse, and know what’s working and where you need to level up.
Step 3: Set Up Automatic Reports
Stay on top of your social media performance by scheduling automated reports.
Go to Social Analytics in the Social Toolkit.
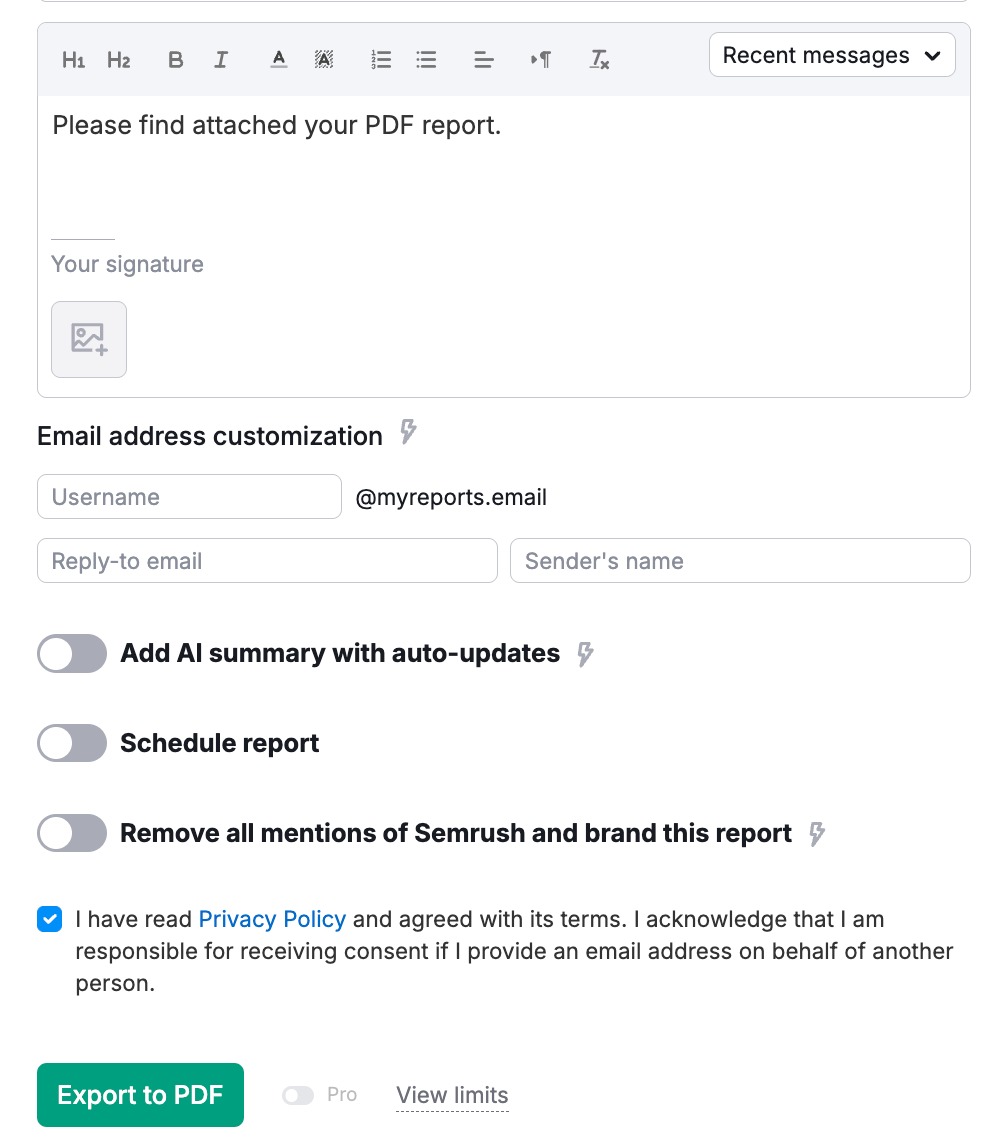
Click on Export to PDF in the top-right corner of the screen.

Enter your email to ensure your reports are delivered straight to your inbox. Choose the schedule that works for you—daily, weekly, or monthly.
You can also customize the report to fit your needs:
- Include an AI-generated summary
- Remove Semrush branding and personalize the report with your own logo
- Add an online dashboard to your report
Once everything’s set, click Export to PDF to set up automatic reporting.
Pro tip: You can also build a custom PDF report that includes not just social data, but a full overview of your digital marketing performance—SEO, social media, local SEO, and more.
Step 4: Generate Your First Full Social Media Calendar
With everything connected and tracking in place, it’s time to create and schedule your first week (or month) of content.
Go to Social Content AI in the toolkit.
Enter your company URL and location to get more relevant suggestions, or provide a short business description in the input prompt.

You’ll see a list of content ideas, arranged by category—brand profile, trending topics, and Semrush insights. You can also create your own categories if needed.
Pick the ideas you like and click Generate next to each one to start creating content.

Then choose:
- The platform (e.g., Instagram, LinkedIn, X)
- The format (e.g., poll, question, promo)
- The tone of voice (e.g., professional, informative, humorous)
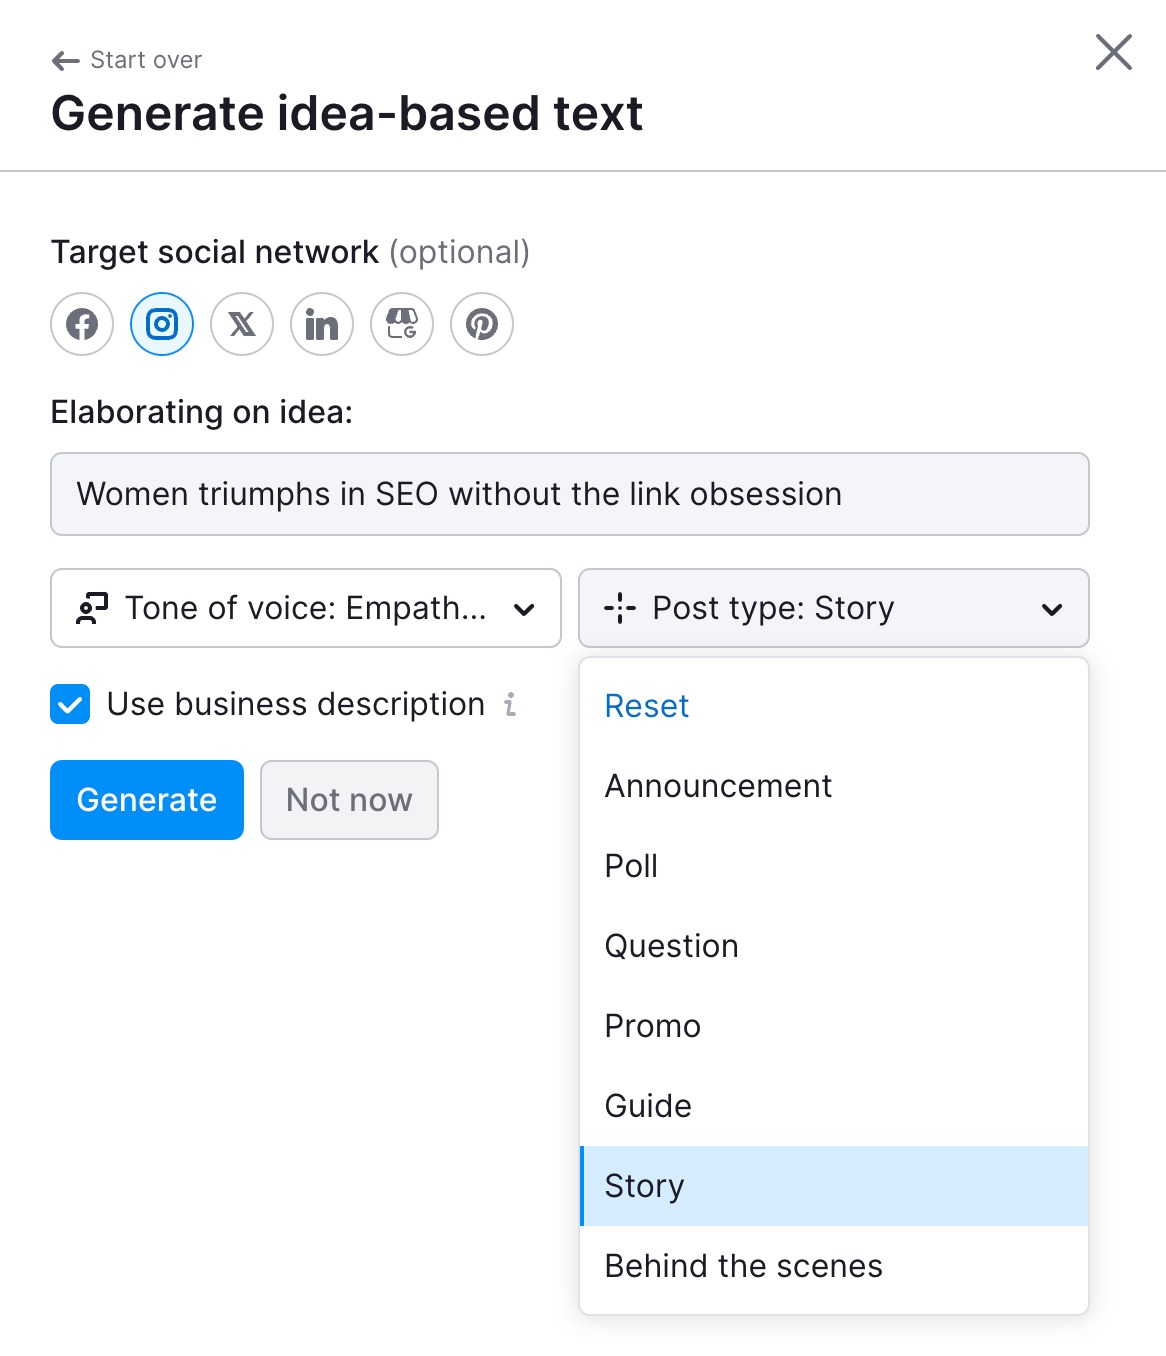
When you’re ready, select Generate.
You’ll now get a first version of the copy. You can then review, tweak, and polish it however you want.
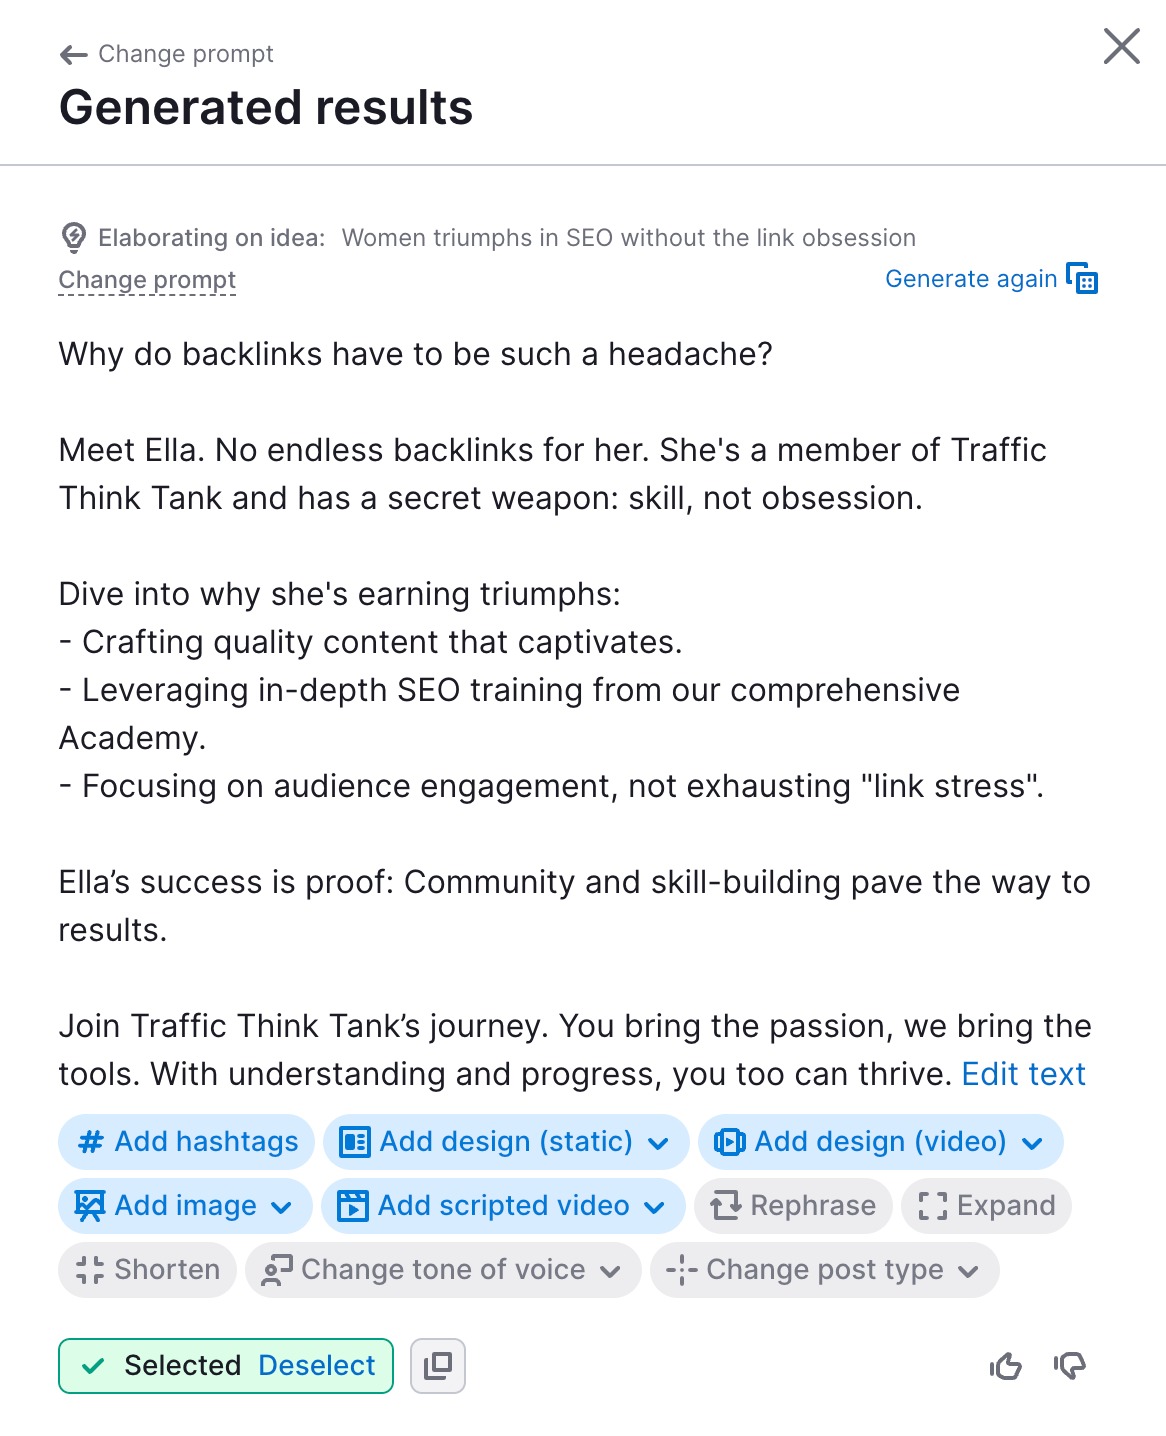
You’ll also find options to:
- Add hashtags
- Add images, static/video design, or even scripted video
- Rephrase, expand, shorten, or change tone with a single click
- Switch post type if the format needs adjusting
You can manually edit the content as needed, or use the AI tools to refine it further with minimal manual effort.
When it’s ready, send your post directly to Social Poster, so you can plan, schedule, and publish it from your interactive calendar.

Repeat this process to fill out your entire social media calendar.